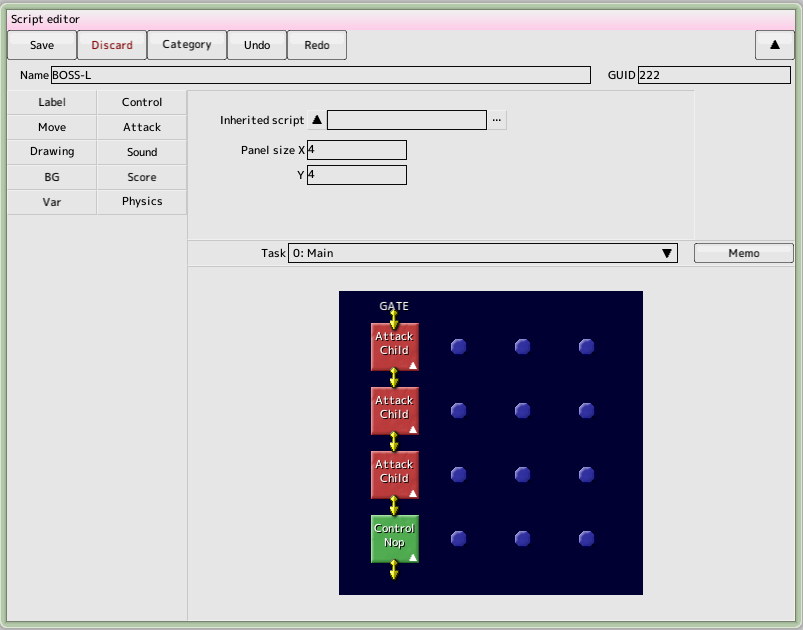
11. Making the enemy boss
Create a boss character to come out at the end of the stageMake a combination of parts using the parent-child hierarchy
Boss body - 4 boss legs - 3 boss turrets
Keep the project file created in the previous tutorial open
 back to the original page
|
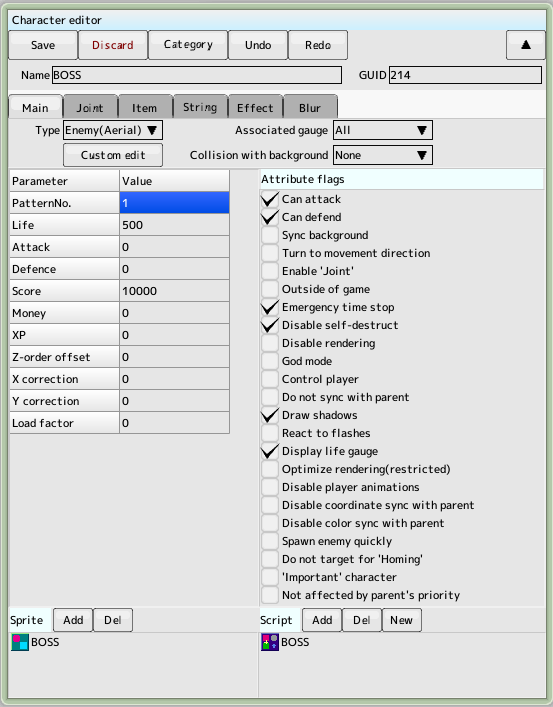
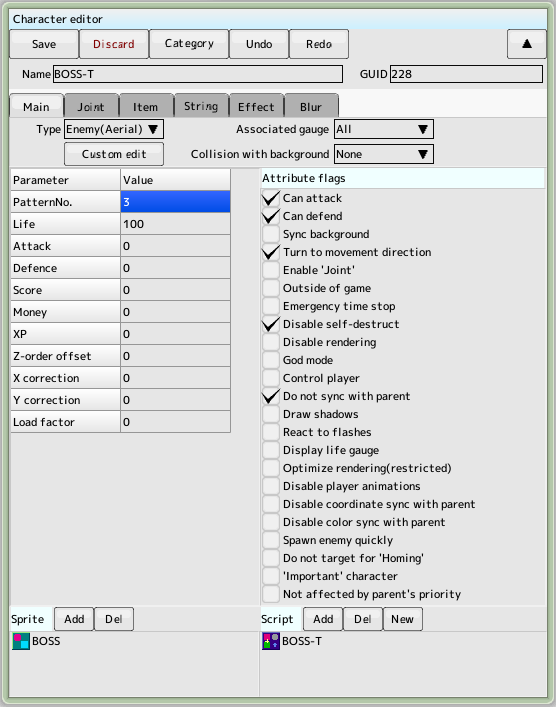
Setting up the boss body, the key is to stop time while the boss is appearing Show stamina is checked, but at this time it is not ready to be displayed Later on in the layout settings will be discussed |
|
| The configuration of the boss leg parts |
|
|
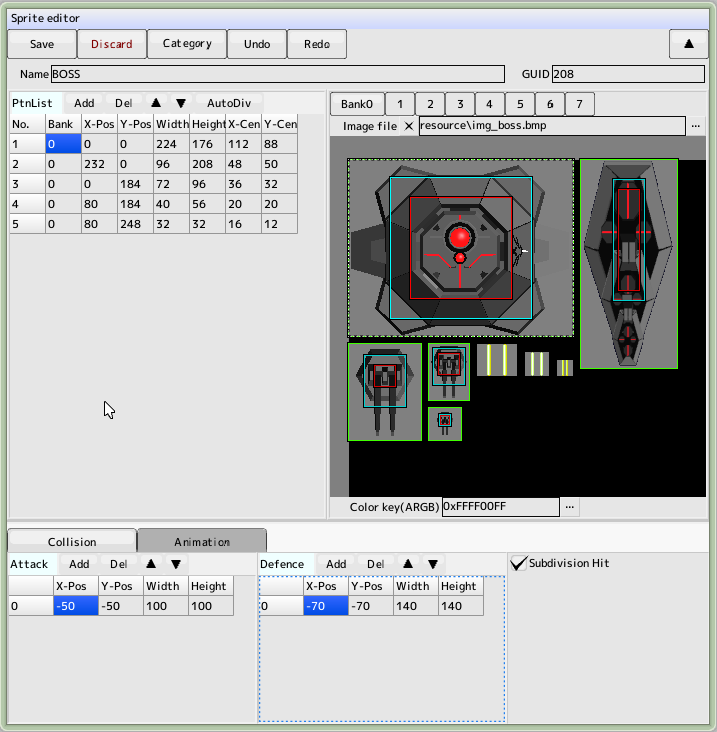
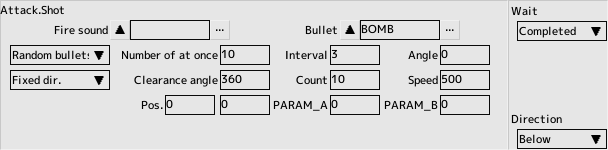
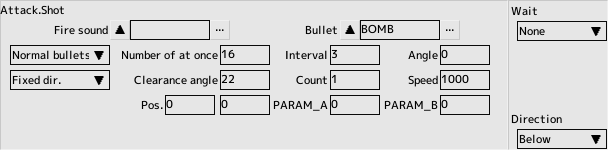
The setting of the boss turret Switching between the three types is done in a script |
|
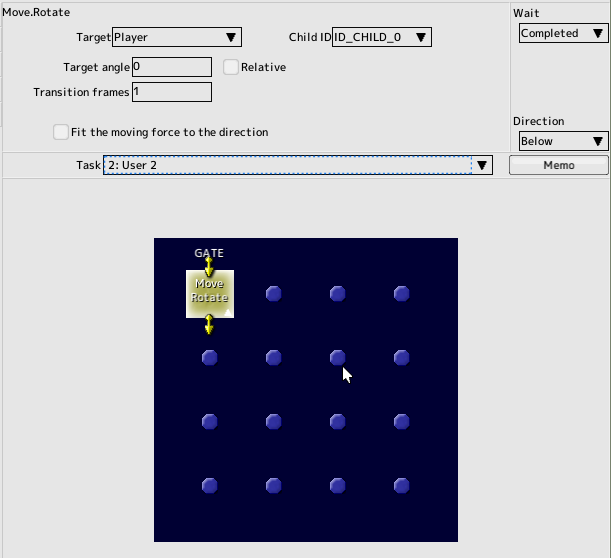
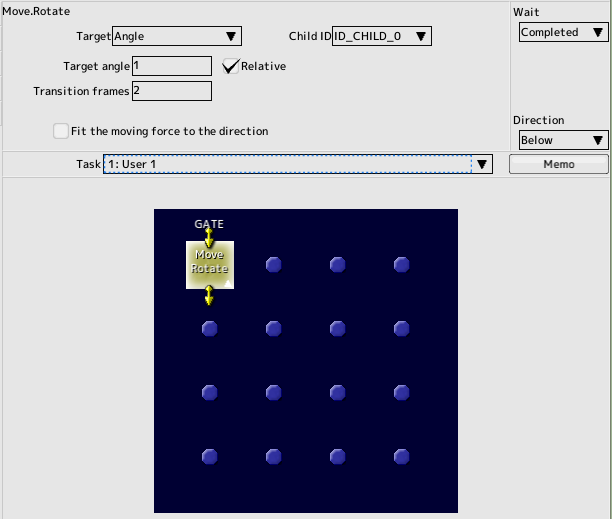
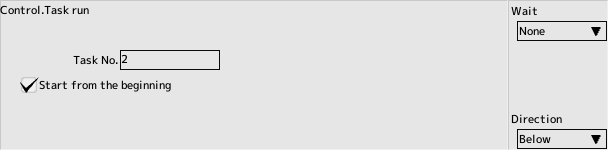
| Launch Task 1 for rotating the body |

|
|
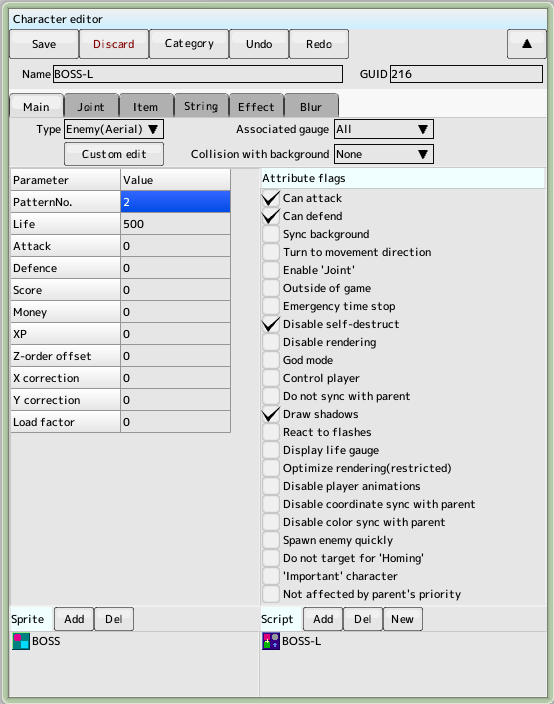
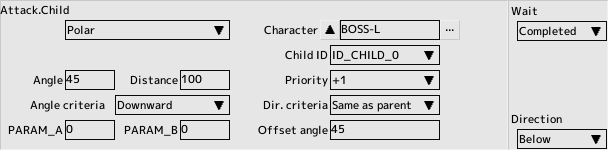
Place the leg parts as children Note that the priority, angle, distance and offset angle are different |
|

|
|

|
|

|
|
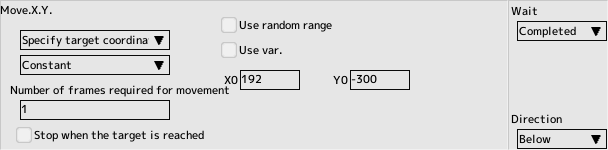
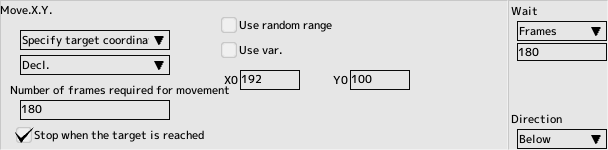
| Move it off the screen above the screen |
|
| Move it into the screen |
|
| Finish the scene |
|
| Task 1 is only one rotating panel |
|
| Explosion effects |
|
| Explosion effects |
|
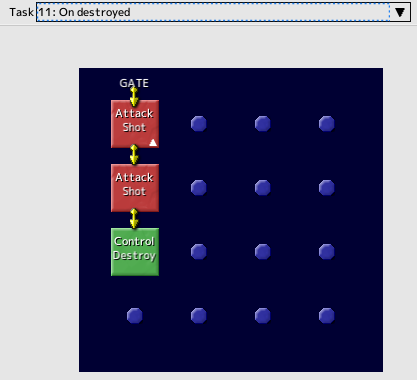
| Finally, do not forget to place the annihilation |
|
|
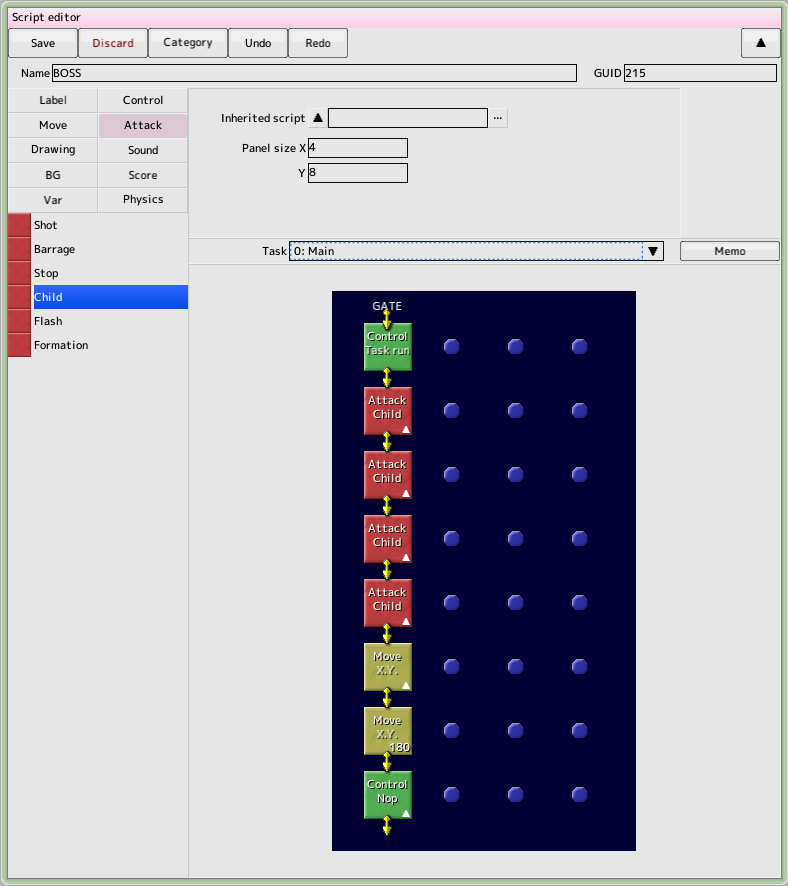
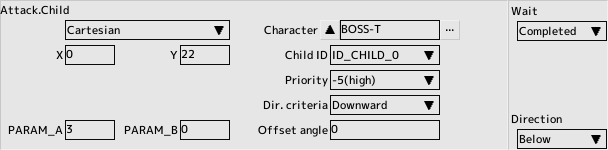
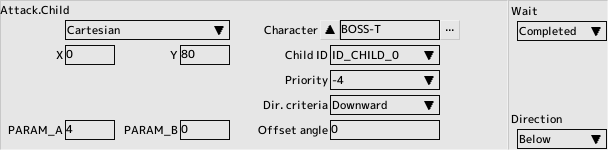
Place the turret parts as a child PARAM_A can be taken on the child side and can be branched in appearance and behavior |
|
|
Note that the coordinates, drawing priority and PARAM_A are different |
|

|
|

|
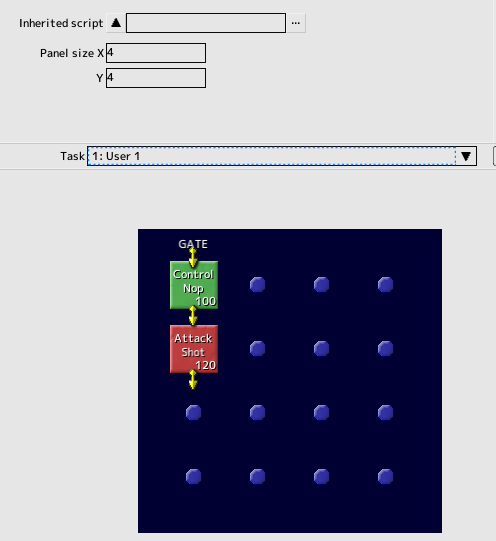
| Launch task 1 for rotation |

|
| Launch task 2 for the attack |
|
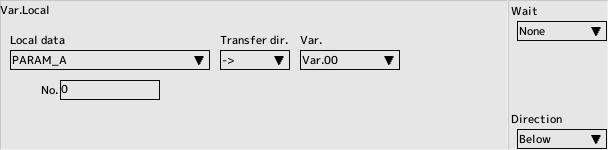
| Assign it to variable 00 since we have received PARAM_A from the parent (leg parts) |
|
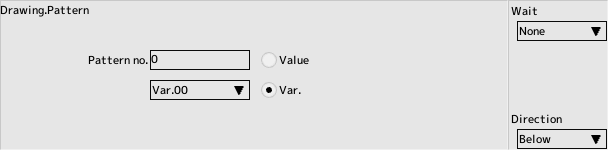
| Reflect the contents of the variable 00 to the pattern number |
|
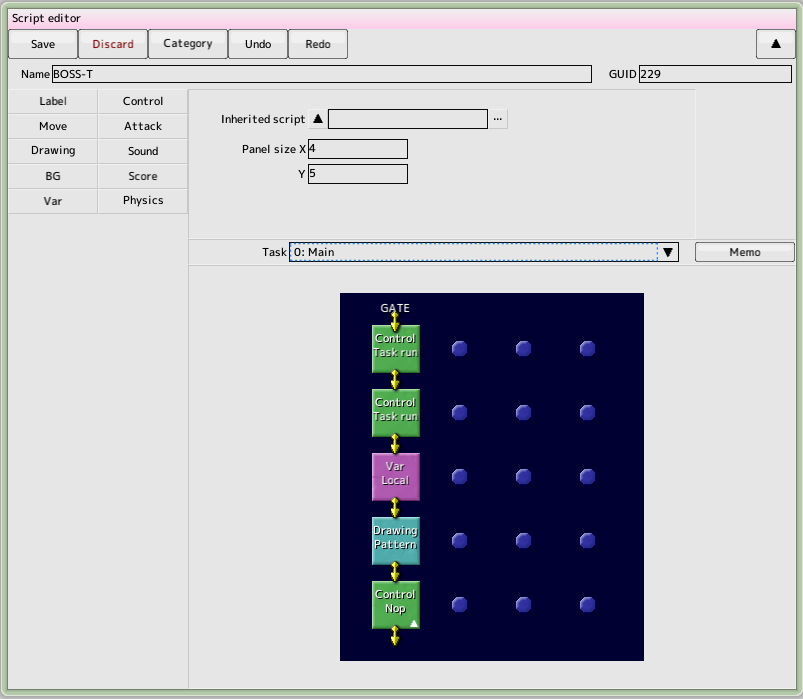
| Task 0 is now finished |

|
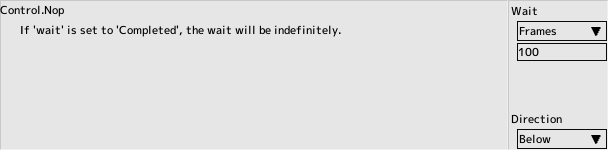
| 100 frame weight to attack |
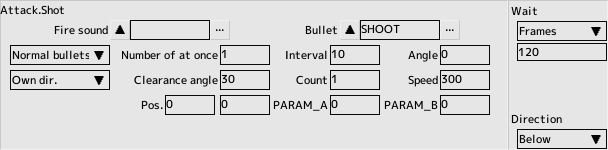
|
| Firing bullets in the direction the turret is facing After firing, 120 frame weight |
|